
How to Install a WordPress Theme (Free & Pro): Step-by-Step Guide
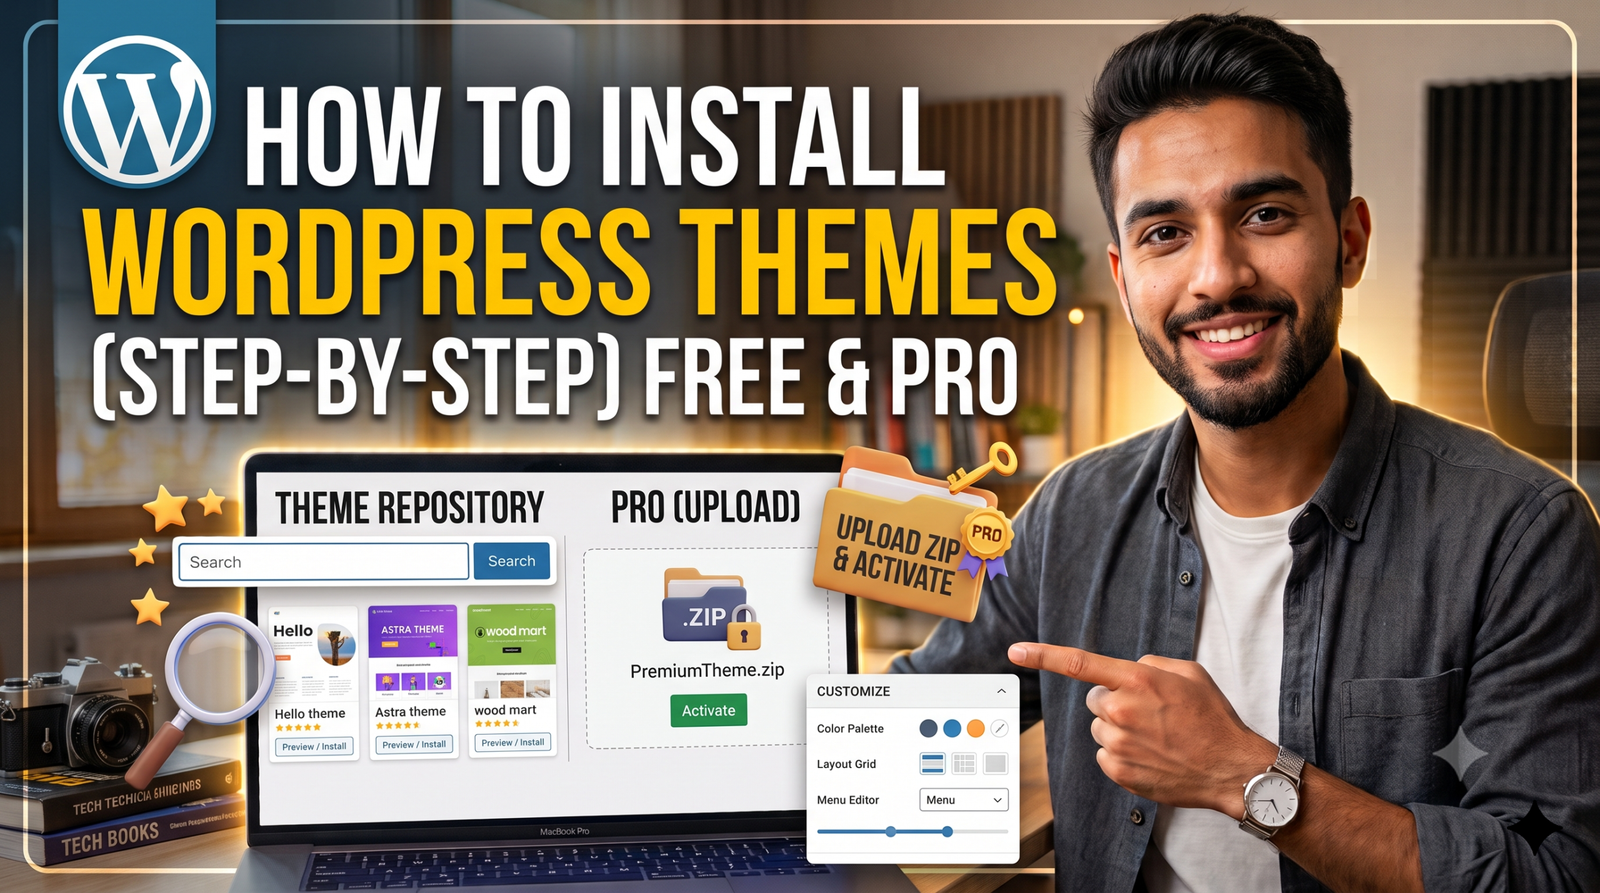
A WordPress theme dictates the visual design, layout, typography, and frontend user experience of your website. While WordPress provides default starter themes out of the box, installing a purpose-built theme allows you to establish your brand identity, integrate smoothly with page builders like Elementor, and deliver a fast, responsive layout across all screen sizes.
Pre-Installation Checklist
Create a Full Site Backup: Always generate a backup before switching themes on an existing site to prevent losing custom layout configurations or widget placements.
Verify Compatibility: Ensure the theme supports the latest WordPress core version and runs smoothly on your hosting server’s PHP version (PHP 8.0+ recommended).
Check Performance & Speed: Select lightweight, well-coded themes (such as Astra, GeneratePress, Hello Elementor, or Kadence) to maintain high Core Web Vitals scores.
Child Theme Preparation: If you plan on modifying template files or adding custom code, set up a child theme to avoid losing modifications during developer updates.
Method 1: Install a Free Theme via the WordPress Directory
The official WordPress Theme Directory offers thousands of free, vetted themes that you can search, install, and activate directly inside your admin panel.
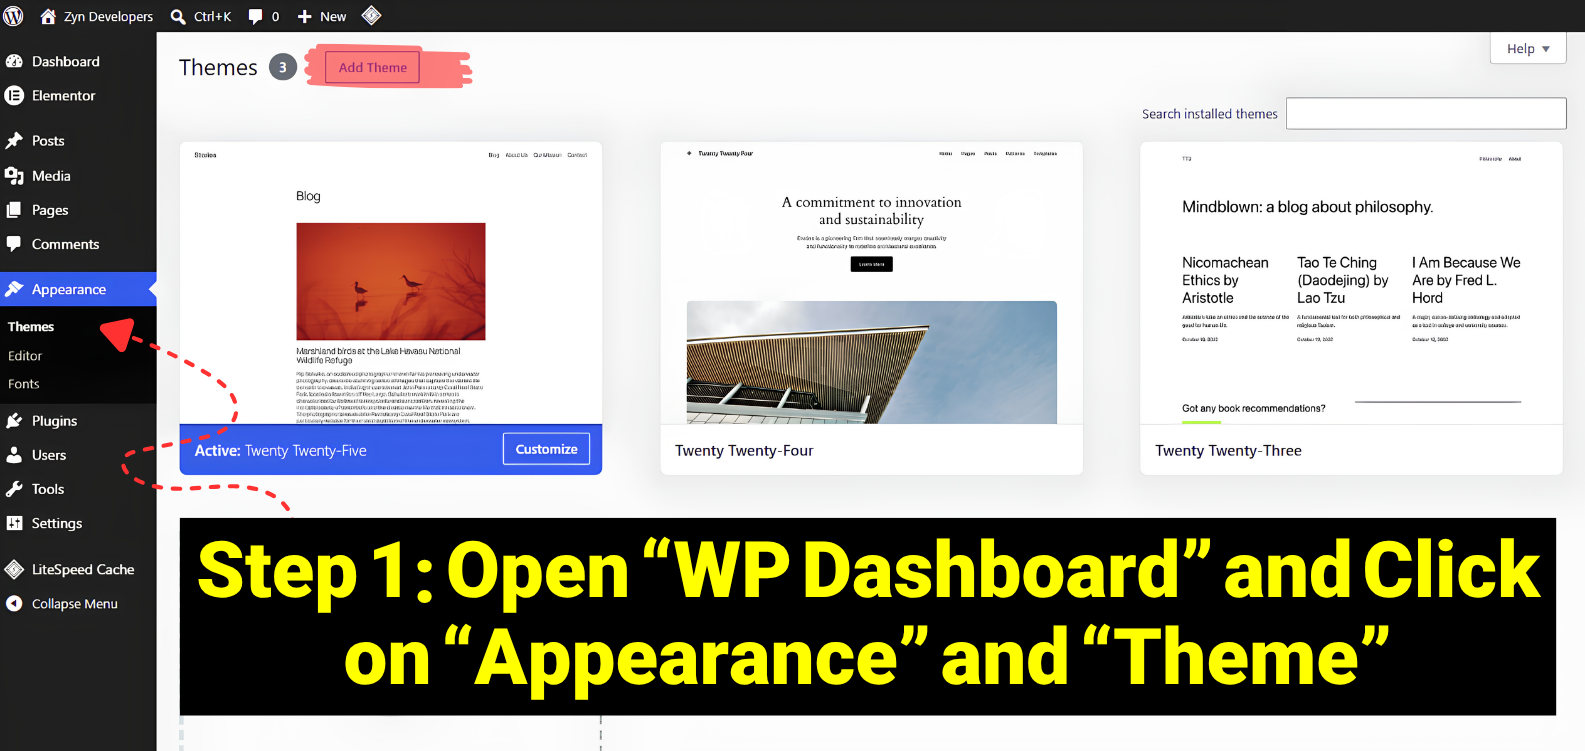
Open the Theme Screen: Log in to your WordPress admin dashboard, navigate to the left sidebar, and click Appearance > Themes.
Add New Theme: Click the Add New Theme button at the top of the page.
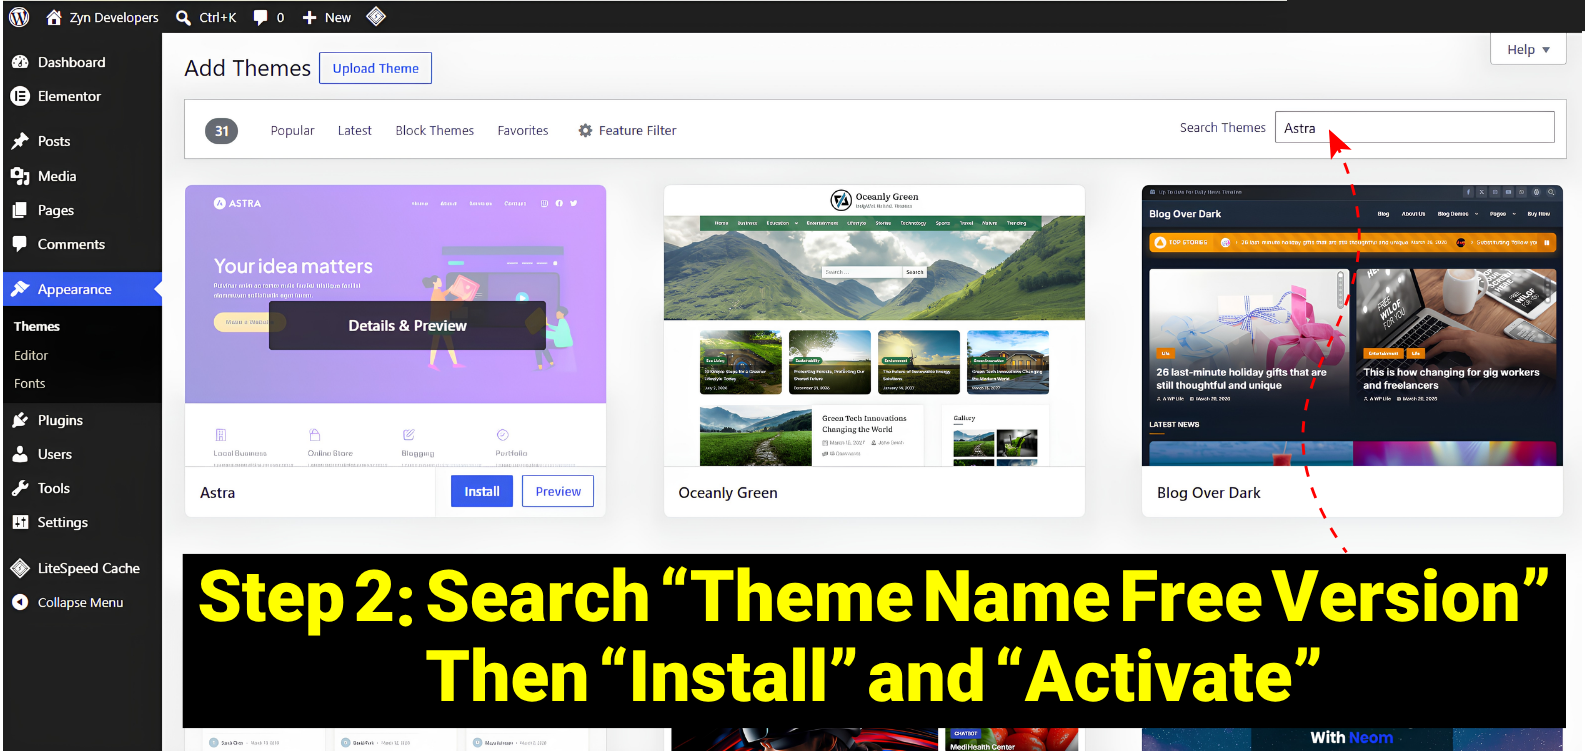
Search or Filter: Use the search bar in the top-right corner to type the theme name (e.g., Hello Elementor, Astra, OceanWP) or click Feature Filter to filter by layout, features, and subject.
Preview and Install: Hover over your chosen theme card and click Install (or click Live Preview to check its structure first).
Activate: Once the download completes, click the blue Activate button to make the design live on your site.
Method 2: Install a Pro or Premium Theme via ZIP File
Commercial themes purchased from third-party developers, marketplaces (such as ThemeForest), or custom builds come as downloadable .zip archives that must be uploaded manually.
Important on Master ZIP Bundles: When downloading from marketplaces, ensure you download the “Installable WordPress file only” .zip. If your download contains licensing PDFs, demo content folders, or child theme folders inside a master archive, unzip it on your computer first to extract the actual theme .zip (e.g., theme-name.zip).
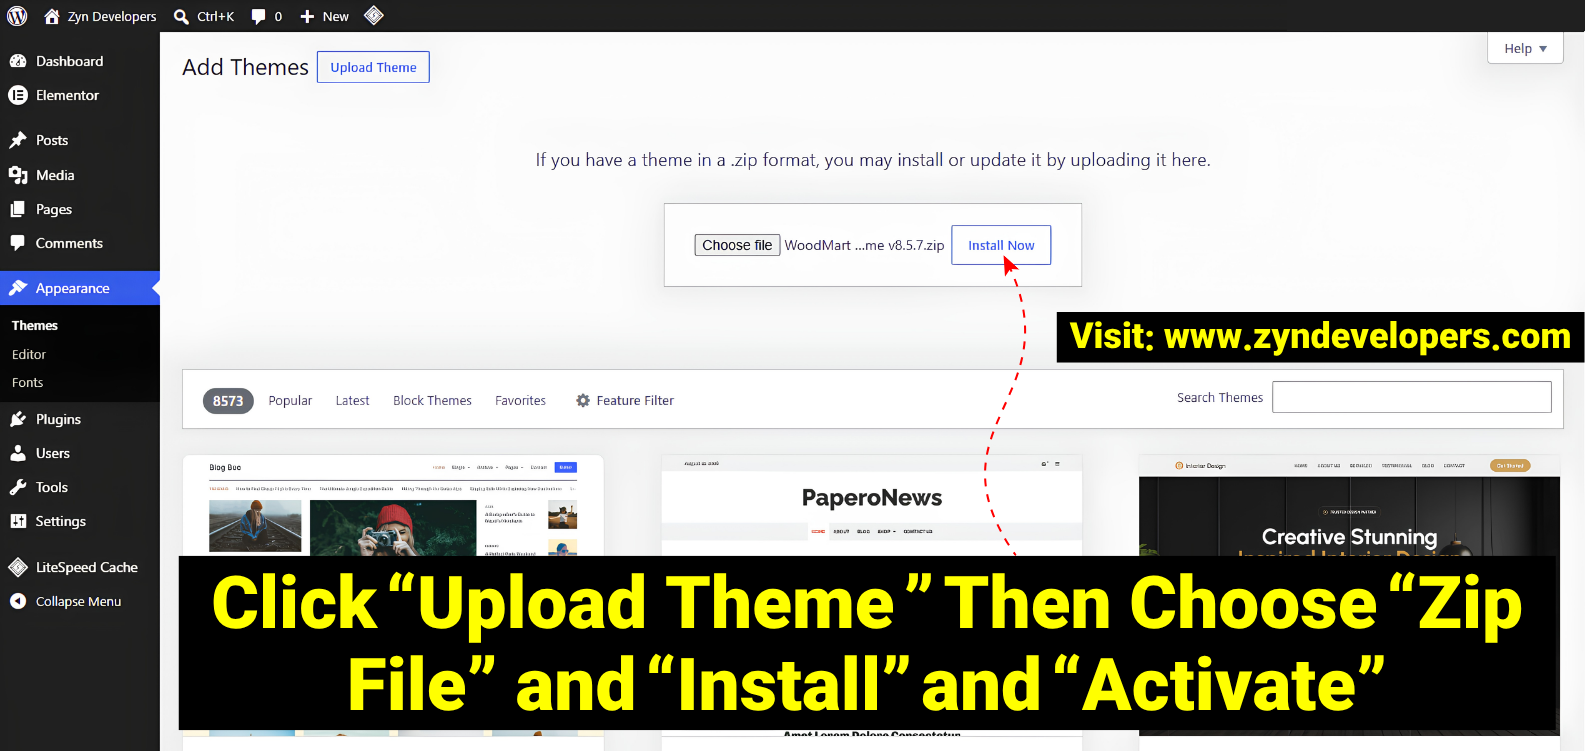
Go to Theme Uploader: In your dashboard, go to Appearance > Themes and click Add New Theme.
Upload Theme: Click the Upload Theme button located at the top of the screen.
Select File: Click Choose File, select the
.ziptheme archive from your computer, and click Install Now.Activate: Once WordPress finishes unpacking the files, click Activate.
License Setup & Starter Templates: Most premium themes will prompt you to enter a Purchase Code/License Key to enable one-click updates and unlock premium demo starter sites.
Free vs. Pro Theme Installation Overview
| Feature | Free Theme (Dashboard Directory) | Pro Theme (Manual ZIP Upload) |
| Source | Official WordPress.org repository | Commercial vendor / developer |
| Upload Needed | No (handled internally by server) | Yes (requires .zip file upload) |
| Prerequisites | None | Must extract the correct standalone theme .zip |
| Updates | Automatic 1-click updates via dashboard | Automatic updates require an active license key |
| Starter Sites | Basic templates | Full turnkey demo imports & premium widgets |