
How to Install a WordPress Plugin (Free & Pro): Step-by-Step Guide
Plugins give WordPress its true power. Out of the box, WordPress provides a dependable foundation for blogging and standard content management. Installing plugins transforms that basic setup into whatever you need—an intuitive drag-and-drop design engine with Elementor, an e-commerce storefront with WooCommerce, a lead-generating hub, or an SEO powerhouse.
Whether you are adding a free tool from the official repository or setting up a premium add-on like Elementor Pro purchased from an external developer, the installation process is straightforward once you know how the pieces fit together.
Pre-Installation Checklist: Choosing Safe & Stable Plugins
Before adding any plugin to your site, take a moment to vet it. Outdated or poorly coded plugins can slow your page load speeds, introduce security vulnerabilities, or trigger conflicts with your active theme.
Active Installations: Look for plugins with strong adoption numbers (for example, Elementor has over 5 million active installs). High numbers reflect active community testing, stability, and widespread support.
Update Frequency: Check when the developer last released a patch. If a plugin has gone unmaintained for more than six months, seek a modern alternative.
WordPress & PHP Compatibility: Look for the confirmation badge stating “Compatible with your version of WordPress.” Also verify that your hosting server runs a supported version of PHP (PHP 8.0 or higher is recommended for modern builders like Elementor).
User Reviews & Support Threads: Check recent 1-star reviews on WordPress.org to see if recent core updates introduced unresolved bugs.
Create a Full Site Backup: If you run a live site with active traffic, always take a quick backup before installing plugins that alter core functionalities (such as page builders, caching engines, or database managers).
Method 1: Install a Free Plugin Using Dashboard Search
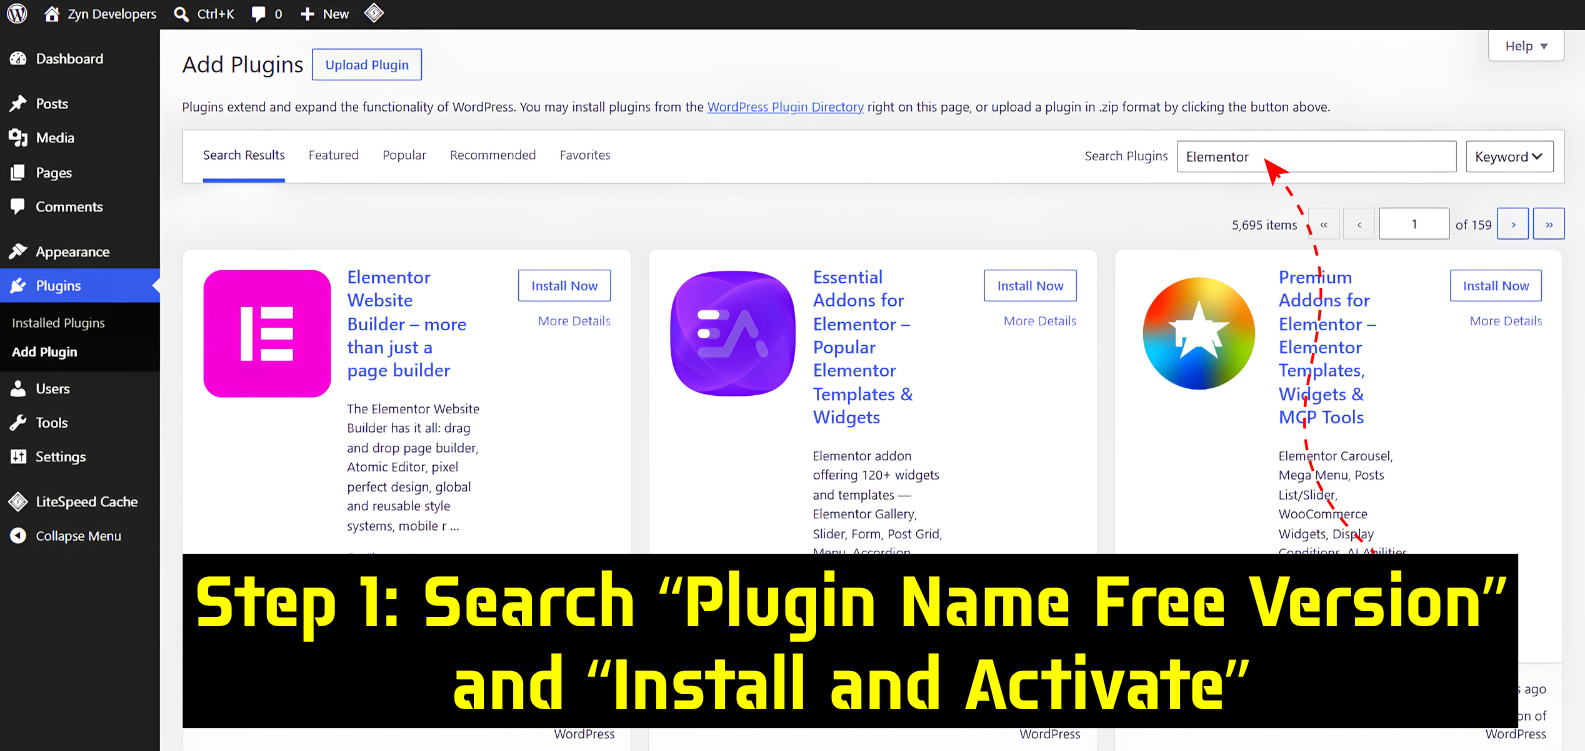
The official WordPress Plugin Directory hosts over 60,000 free, open-source plugins. You can search, download, and activate tools like the free Elementor Website Builder, Rank Math, or WPForms directly from your admin dashboard without handling any manual files.
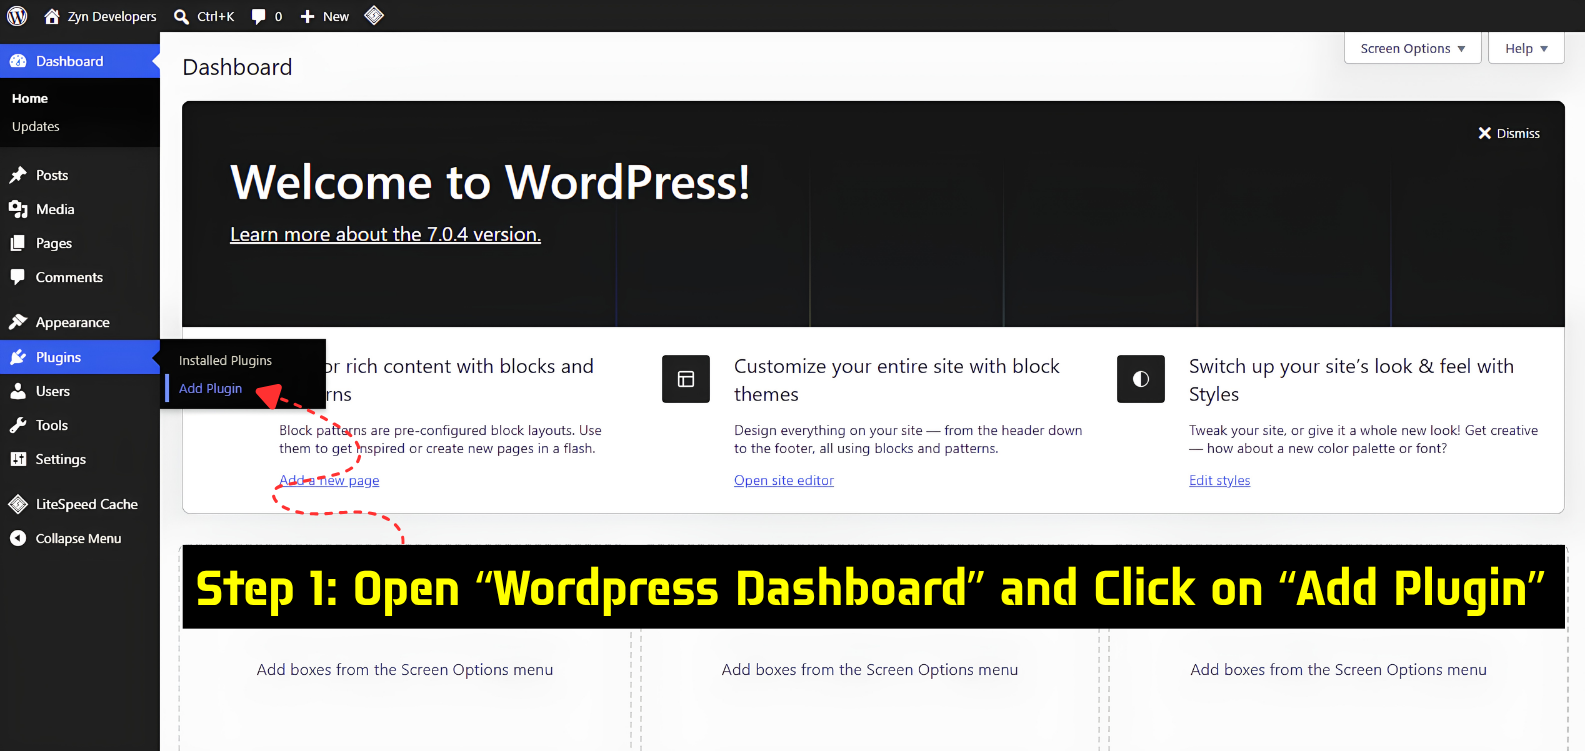
Step 1: Open the Plugin Directory in WordPress
Log in to your WordPress admin dashboard
(https://yourdomain.com/wp-admin).In the left-hand navigation sidebar, hover over Plugins.
Click Add New Plugin (or Add New).
Step 2: Search by Name or Feature
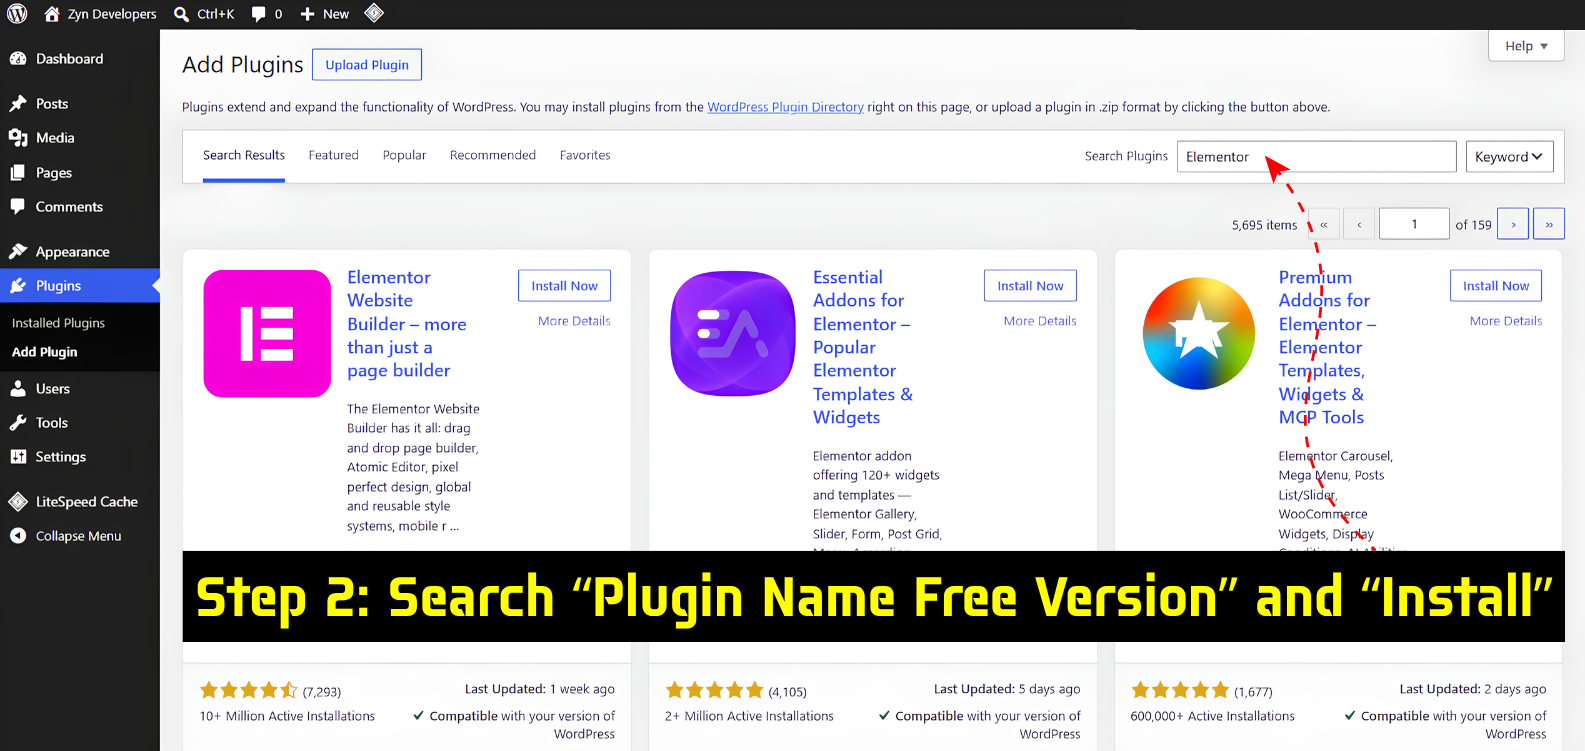
Locate the search bar in the upper-right corner of the screen. You can find plugins using three search types:
Plugin Name: Search exact tools like Elementor, Yoast SEO, Rank Math, WPForms, or UpdraftPlus.
Keywords: Search by functionality, such as “page builder”, “image optimization”, “contact form”, or “caching”.
Author Name: Search trusted developer teams like Elementor.com, Automattic, or Awesome Motive.
Step 3: Evaluate the Results Card
WordPress displays results in individual cards. Each card gives you critical health indicators:
The official plugin name and verified author (e.g., Elementor Website Builder by Elementor.com).
A brief description of features and capabilities.
Star ratings and total review counts.
Active installation metrics.
Version compatibility status with your current WordPress core.
Step 4: Download and Unpack
Click the Install Now button on your selected plugin’s card. WordPress will handle the rest behind the scenes: downloading the package directly from WordPress.org and unpacking it into your server’s /wp-content/plugins/ directory.
Step 5: Activate the Plugin
Once the files finish unpacking (usually 2–5 seconds), the button turns bright blue and changes to Activate.
Click Activate. The code is now loaded and running on your website.
Step 6: Locate the Plugin's Settings Panel
Developers place their configuration panels in different spots depending on the plugin’s scope:
Top-Level Sidebar Menu: Major toolkits create their own standalone menu item on the left sidebar (e.g., a dedicated Elementor tab with Templates and Settings, or WooCommerce).
Under Settings: Utility plugins frequently locate their controls inside Settings > [Plugin Name].
Under Tools: Site health, maintenance, and database plugins usually live inside Tools > [Plugin Name].
Method 2: Install a Pro or GPL Premium Plugin Using a ZIP File
All WordPress plugins are built on PHP and released under the GNU General Public License (GPL). Under GPL terms, developers and users have the freedom to redistribute and use premium code.
Whether you purchase a commercial plugin directly from a vendor or download a GPL-distributed premium package (such as Elementor Pro, Rank Math Pro, or WP Rocket), these plugins are not hosted on the official WordPress.org repository. You must upload and manage them manually as compressed .zip archives.
Step 1: Ensure Free Base Plugins Are Installed First
Many premium and GPL Pro plugins function as extensions rather than standalone software.
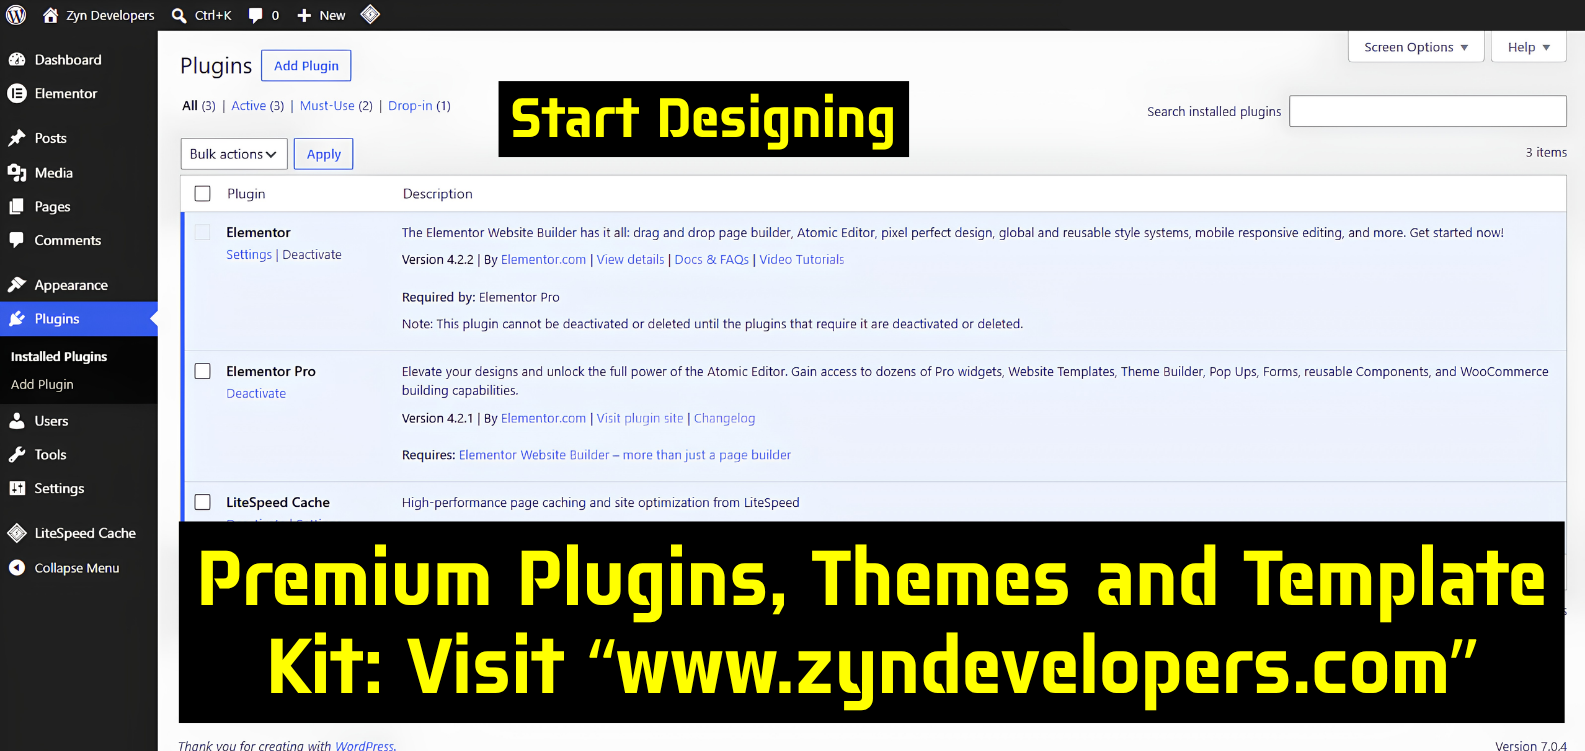
Elementor Pro Example: You must install and activate the free Elementor Website Builder (via Method 1) before installing the Elementor Pro ZIP file.
If a pro tool requires a core companion, keep the free base version active on your site.
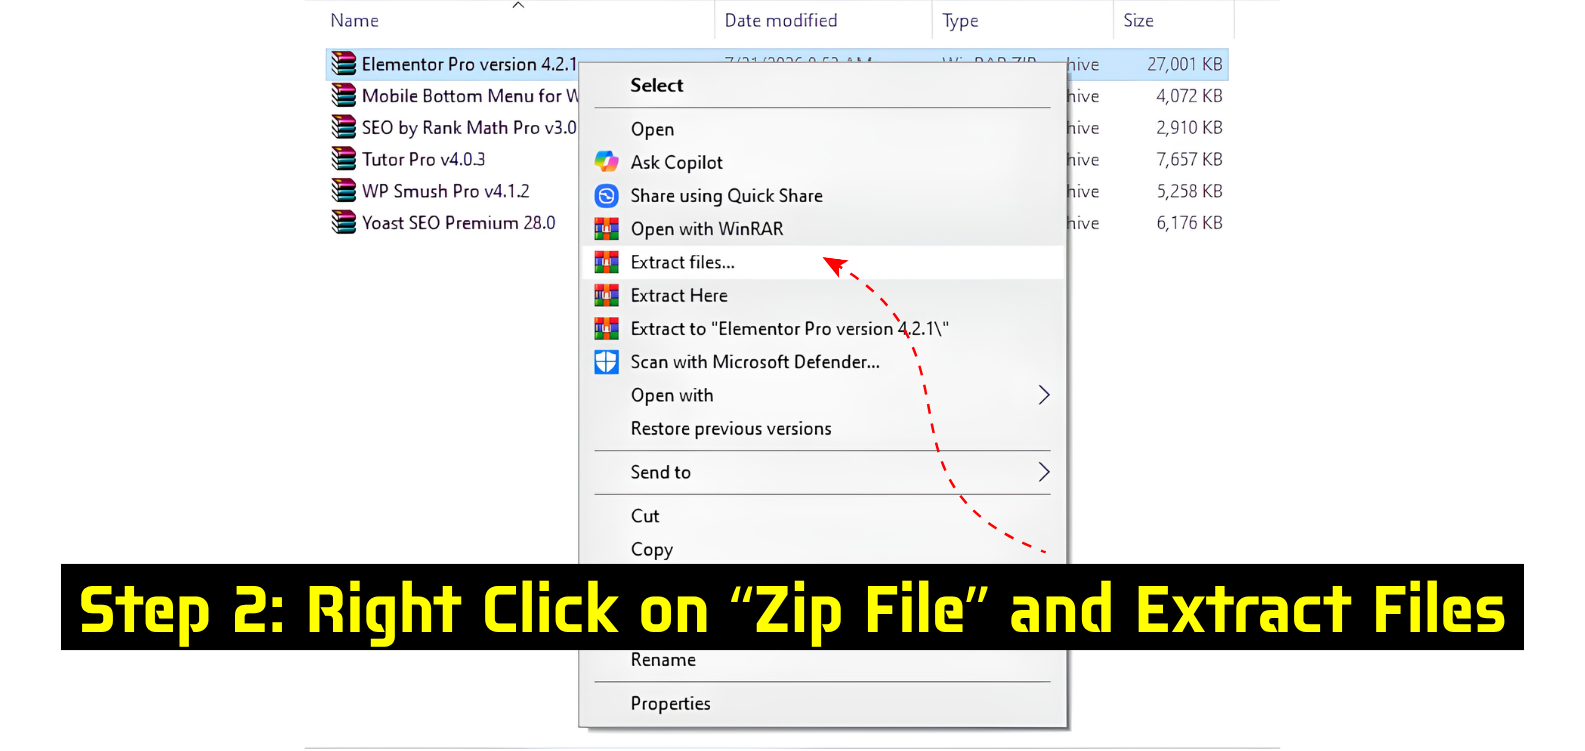
Step 2: Prepare and Verify the ZIP File
Download the plugin
.zipfile to your computer.Inspect the download: Some vendors or GPL distribution sites package documentation, license text files, and extra add-ons inside one large “master” ZIP bundle.
If your download is a master bundle, extract it on your computer first, find the actual plugin installer file (e.g.,
elementor-pro.ziporrank-math-pro.zip), and keep that specific file zipped.(Recommended for GPL downloads) Upload the
.zipto a scanner like VirusTotal to ensure the code is clean and untampered.
Step 3: Open the Manual Plugin Uploader
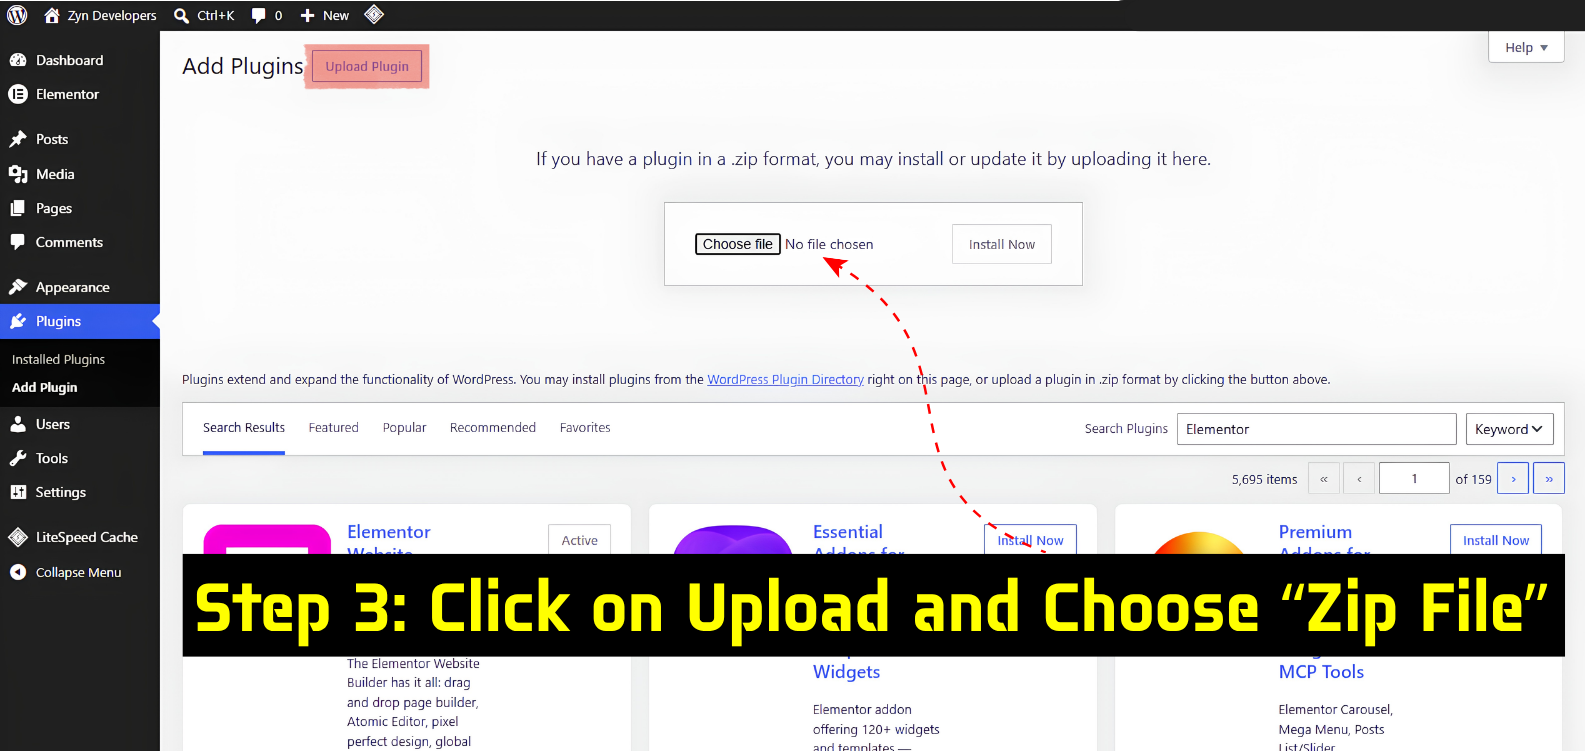
In your WordPress admin dashboard, navigate to Plugins > Add New Plugin.
At the top of the screen (next to the “Add Plugins” header), click the Upload Plugin button.
A file upload box will open in the main panel.
Step 4: Select and Install the Archive
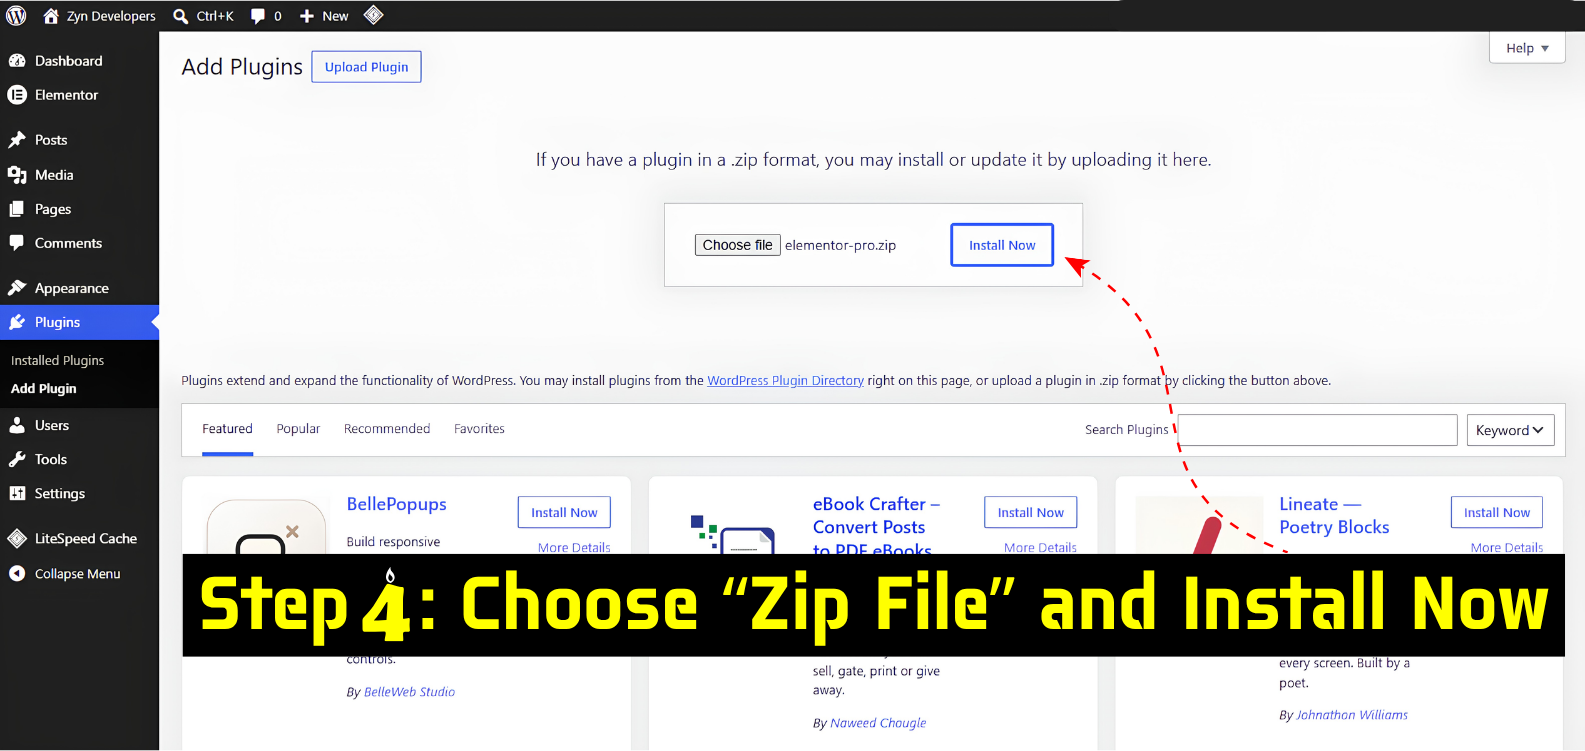
Click Choose File (or Browse).
Select your clean
.zipfile from your local storage.Click Install Now.
WordPress will upload the file to your web server, extract the folder contents, and verify that the plugin header files match standard WordPress structure.
Step 5: Activate the Plugin
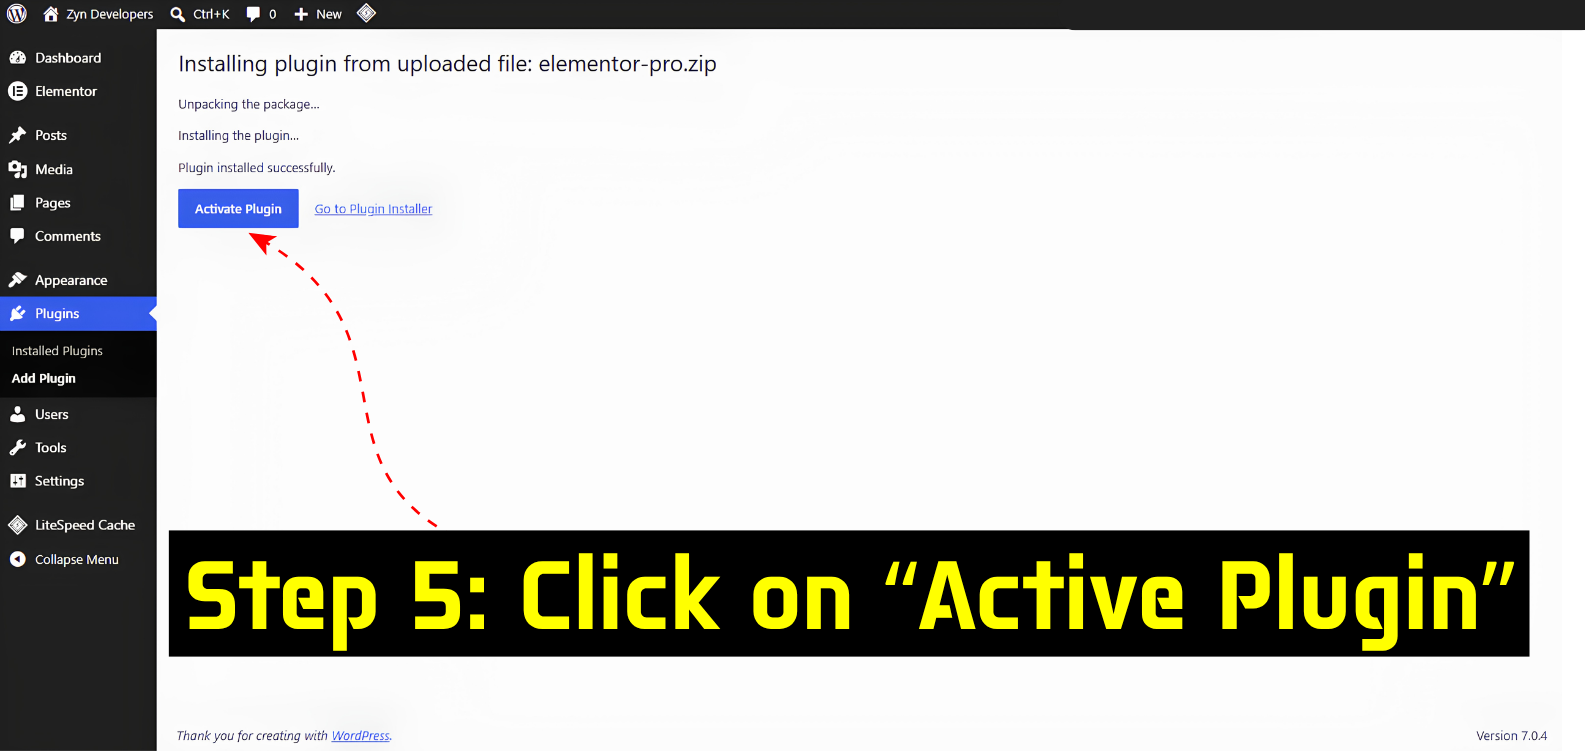
When the extraction finishes, the screen will display: “Plugin installed successfully.” Click the blue Activate Plugin button.
Understanding License Keys & Updates on GPL Versions
Official Commercial Licenses: If you bought directly from the developer, navigate to the plugin’s license page (e.g., Elementor > License) and click Connect & Activate or paste your purchased API key to enable 1-click dashboard updates.
GPL Version Distribution: GPL-licensed plugins come with all core pro features, widgets, and functions unlocked directly in the code without needing an API key. However, because they are not connected to the vendor’s private update server, they do not update automatically via 1-click in your WordPress dashboard.
How to Update a GPL Plugin Manually: When a new version is released:
Download the updated
.zipfile from your GPL provider.Go to Plugins > Add New Plugin > Upload Plugin.
Choose the new
.zipfile and click Install Now.WordPress will detect the existing folder and show a comparison screen. Click “Replace current with uploaded”. Your settings, templates, and data will remain completely intact.
Free vs. Official Pro vs. GPL Plugin: Complete Comparison
| Feature | Free Plugin (Dashboard Search) | Official Pro Plugin (Vendor ZIP) | GPL Pro Plugin (Redistributed ZIP) |
| Source | WordPress.org Repository | Direct Vendor / Creator Website | Trusted GPL Community / Repository |
| Installation Method | 1-Click Search & Install | Upload .zip Archive | Upload .zip Archive |
| License Verification | None Required | Requires Vendor API Key | Pre-activated / No Key Required |
| Pro Features & Widgets | Limited to Free Tier | 100% Unlocked | 100% Unlocked |
| Update Method | 1-Click Automatic via Dashboard | 1-Click Automatic via Vendor Server | Manual upload via “Replace current with uploaded” |
| Official Support | Public Community Forum | Direct Developer Ticket Support | Self-supported / Community docs |